Monday, February 26, 2018

Drunken Chalk Ink Technique


Good day, everyone!  Today's blog post is all about PowderPuff Chalk inks! They pack a punch in a small package. You can stamp, color and blend with them but did you know you can create beautiful backgrounds, too? Let's take a look at the Drunken Chalks technique...

Tools needed: Powderpuff chalk inks, rubbing alcohol, glossy card stock and embossing gun.


Easter Blessings


Choose your colors and fill a mister with rubbing alcohol. Cut a piece of glossy card stock to the size you desire.

Starting with the lightest color, press pad to glossy card stock in a random fashion. Next, apply medium color in the same manner and finally the third color. Saturate the glossy card stock with the mister filled with alcohol. Use embossing gun to swirl the color. Move the gun around the glossy card stock and you can see the colors run together. Dry completely, moving gun constantly, so paper will not bubble.

You can add a metallic shine by adding a gold pigment ink. Press pad directly on the glossy card stock as you did with the chalk ink. Saturate the card stock with the alcohol filled mister.

Use embossing gun to move the color as you did with the chalk inks. 

Spray finished piece with Clear sealer in a matte finish. This will keep the pigment ink from rubbing off. 
**************************************
 You can easily transform this technique for use on a scrapbook page. I used a 3 x 11 strip of glossy card stock and did the above steps using Tropical punch, Island orange chalk inks and silver pigment ink. I usually don't make one photo pages but this picture of my grandson, Andrew with his cousin, Stella made this layout the exception to the rule. This is how I began to create this...


I chose a piece of the Spring Showers paper and tore a "v" shape in the top and sides of the paper. Using a hole punch and eyelets. I set eyelets along the sides of the "v" shape.

I laced ribbon through the eyelets and taped one set to the back of the paper and the other  "v" shape I tied a bow.

I gathered my embellishments; most came from fussy cutting the designs out of the paper. I die cut the trellis and flourish  and punched some green flowers from card stock. I took the glossy card stock background paper I created and punched out flowers from it. 

Matted my photo from another sheet of paper from Spring Showers

Layered my embellishments and added jewels to the center of my flowers. I inked all my fussy cut pieces with chalk ink.

I added pearls to the smaller punch flowers.


                                                                   Cousins
Finished Layout
PowderPuff chalk inks can do oh, so many things! I hope you give it a try! If you are a visual learner, you can watch the video Here. Have a great day!


Quick Quotes products used: 
Capri Blue
Bermuda
Key Largo
Island Orange
Tropical Punch
Spring Showers...coming soon
Copper Brads
Vellum Quote-Cousins

other products: Flower punch, eyelets, ribbon, card stock, scissors
trellis die-cheery lynn
flourish die-spellbinders
encore metallic ink pad, gold and silver


Thursday, February 15, 2018

Club Q-Alternate Project

Hello, everyone! I have been playing with the Club Q kit! Didn't you love the Club Q kit this month? I sure did but I took the same papers and did something different with mine. Let's take a closer look...
"Enjoy Life Anywhere"

I chose to use the banner to frame my photo and used the square piece in the kit to frame my photos as well.
The large banner pieces were used as a main focal point for part of the title.
I used the laser cut banner to "frame" my photos and repeated the frame with the large square piece in the kit.

Here is what I chose to do with the second page layout in the kit....


"Memories like these..."

Using a circle cutter, I cut a circle to fit the chipboard die cut and cut a few half circles as well.

Once again, I used the flags to frame my photos and stamped the words on scrap white paper, punched with a circle punch and inked all of them with chalk ink.

Take a closer look...after punching out the flourish pieces from the chipboard; I used it as a stencil to add more flourishes. They turned out looking a little reminiscent of watercolor...and I only used our chalk inks!

I pushed the ink through with a makeup sponge.

The next project in your kit was an accordian 4x4 mini album. I chose to add two pieces of chipboard and three pieces of 8x8 cardstock and created a squash mini album and with the leftover scraps...a card!


The full instruction for this mini album can be found here :Alternate project for Club Q-Squash Album The kit also included a great album that I am turning into a recipe book but haven't quite finished. Club Q is a great kit that gets delivered right to your door...and you are never limited as to what you can create with it. Have a great time creating with your Club Q kit!                                     


Quick Quotes products used:
                                  Club Q kit
Spring Showers 101...COMING SOON

Additional products: Cardstock, chipboard,
 cricut-Plantain cartridge


Tuesday, February 13, 2018

Thursday, February 8, 2018

Graphic 45 Winter Wonderland

Double page layout using Graphic 45 and Tim Holtz dies


Hope you have a great day!

Tuesday, February 6, 2018

Tying the Knot with Spring Showers

 Hello, everyone! Can you believe we are in February already? That means Valentine's Day is around the corner and what better way to celebrate than with a love themed layout?
"Tying the Knot"
 I chose the NEW Spring Showers paper line to showcase my son and daughter-in-laws wedding photos. It is a beautiful collection of water colored floral and leafy greens. It also contains beautiful, bold prints in argyle and coral geometric shapes. Beautiful yellows, teals, blues and a red, highlight this paper line. Did I also mention it has the gorgeous white wash wood board print? Oh, the possibilities are endless with this collection!


I used all the different prints to punch out hearts with different methods...cricut machine, punches and even a few free hand cuts! 

Left side of layout. I used the cricut machine to die cut the title from the paper collection and a border punch to highlight the striped paper. I inked the edges of all the pieces with Key Largo ink.

Right side of the layout. I used pearl flourishes to add a little flair and the phrase came from Paper Phrases sheet from the Far and Away collection. It coordinated perfectly with Spring Showers.
Bonus Layout:

It has been a very cold winter in the mid-west and I have been dreaming of sun and sand! I used the Navigator paper collection to create this layout.

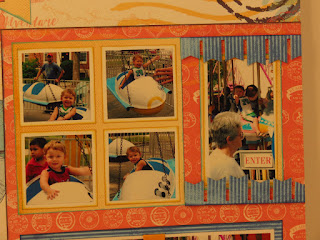
                                           "Sunkissed"

Add caption


I hope everyone enjoys Valentine's day with a little love, laughter and of course, CHOCOLATE!

Quick Quotes Products:

Spring Showers:
QQP-SG100
QQP-SG101
QQP-SG102
QQP-SG103
QQP-SG104
QQPSG105
PowderPuff Chalk Inks: Key LargoCool Gray

Bonus layout: Navigator
PowderPuff Chalk Inks: Deep SeaBermudaCactusTropical PunchCapri BlueKey LargoIsland Orange
 Vellum Strip: Journey Vellum Strip

Other Products used:

Cricut machine and cartridge, Sweetheart
Border punch-We R Memory Keepers
Flourish Pearls-Want 2 Scrap
Bonus Layout:
Oval Punch-Stampin' Up
Tropical Hibiscus and Shells- Heartfelt Creations

Scissors, trimmer, foam dots, adhesive