"Fly Away with Me"
Step by step tutorial:
Photo mats for this layout are as follows:
1.
Photo Mats: (3)- 4x6 Navy Cardstock and (4)- 3 ¼
x 4 ¼ Navy cardstock. White mats are cut 1/8 of an inch smaller than Navy mats
and inked with POW96 Vanilla Cream.
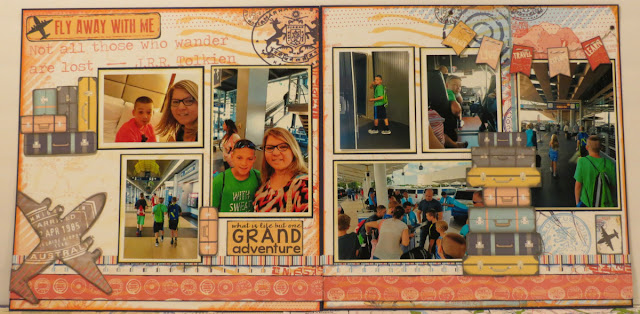 |
Finished Layout
Instructions:
1.
Take QQP-FW101 (Airplane collage) paper and cut
down to a 11 7/8 x 11 7/8 square. Ink the edges of the paper with
POW98-Tropical Punch and POW101-Island Orange inks. Attach with adhesive to
12x12 Navy Cardstock. This will be the left side of the double page layout.
2. Take QQP-FW100 (Postage Collage) paper and trim
down to a 11 7/8 x 11 7/8 square. Next, take this piece and place in the
trimmer so that the postage image, that is pictured in the top right corner, is
now located in the bottom left corner of the trimmer. Slide paper to 7 ½ inch
mark and cut. Ink the edges of this piece on the top, bottom and right side
only using the ink listed in step one.
3.
Now, glue this inked piece to the LEFT side of
the second page of the navy 12x12. Take the remaining piece with the floral
image and ink with the same ink in step one on the top bottom and RIGHT side
only. Adhere this piece to the right side of navy cardstock butting it up to
the edge of the 7 ½ piece already attached.
|
 |
4.
To assemble the borders for each page, take
QQP-FW104 (multi-colored stripe) paper and cut (2)-1 ½ inch strips. Take second
piece of QQP-FW101 (Airplane Collage) paper and fussy cut grey airplane image
from the paper. From the same paper, cut (2)- 1” inch strips from the top of
the paper (We will use the orange travel stamp side) and then (2) additional
strips that measure ¾ of an inch wide (We will use the side that is mostly
white) and add a decorative edge using something from your stash: scissors,
border punch, etc. Ink these strips with POW97 Deep Sea on the decorative edge
side.
5.
Adhere the ¾ decorative edge strip to the 1 ½
inch striped paper strip (roughly 3/8 of an inch from the top). Next, take the 1-inch
orange travel stamp strip and ink with the ink used in step 4 and glue roughly
1/8 inch below decorative edge strip. Use this finished border as a guide to assemble
second border. This will ensure borders line up and match. After both are
assembled, glue them to each page about 3/8 of an inch from the bottom of page.
|
 |
6.
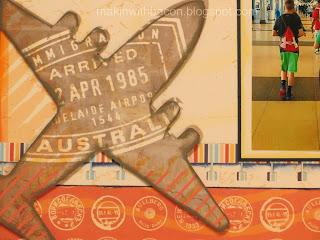
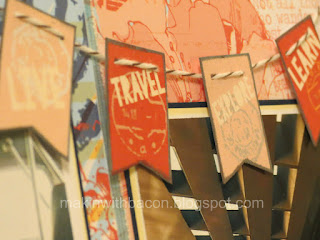
Embellishment assembly: Cut title “Fly away with
me” from QQP-FW500 ink edges with POW97 Deep Sea. Cut banner, “Grand Adventure”
saying from QQP-FW600 and ink edges of banner with POW105 Cool Grey. Cut small
airplane image away from Grand Adventure saying, to create two separate pieces.
Ink the saying with POW97 Deep Sea and airplane with POW105 Cool Grey. Fussy
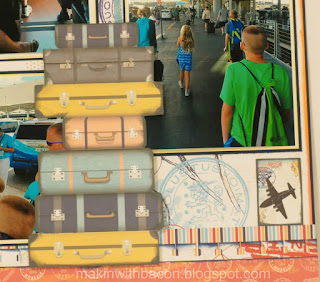
cut the following suitcases from QQP-FW103: (6) individual suitcases for left
side of page and (1) group of 7 suitcases left intact as a group for right side
page. Ink all suitcase pieces with POW105 Cool Grey. Large airplane image cut
earlier in step 4 is also inked with POW105 Cool Grey.
|
 |
| Banner |
 |
| Suitcase group |
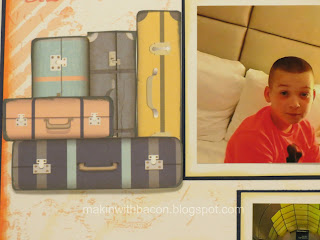 |
| Suitcase individuals |
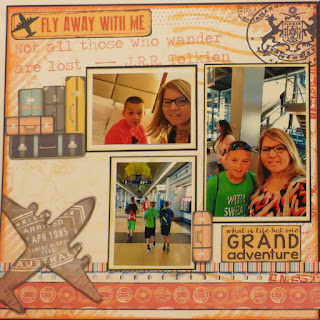 |
Left side page assembly: Attach inked, fussy cut
Airplane with foam adhesive and place over airplane image on the paper. Take
one 4x6 photo mat and two 3 ¼ x 4 ¼ photo mat and attach to page as shown in
the photo of page. Next, attach the saying “What is life but one Grand
Adventure” underneath the 4x6 photo mat. Glue three suitcases vertically to the
right side of the top smaller photo mat. Add foam tape or dots to one large
suitcase and attach horizontally to the bottom of the suitcases and one small
suitcase right above it. Take another suitcase with foam tape attach and adhere
to the left of the Grand Adventure saying, overlapping the photo mat slightly.
Lastly, adhere title, “Fly away with me” to the top left corner.
|
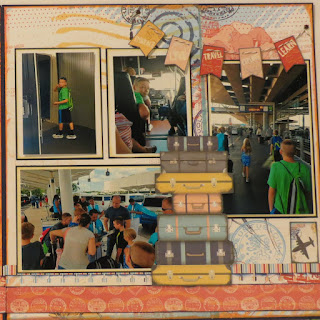 |
Right side page assembly: place the remaining
photo mats as shown in the photo of page. Add foam tape to the back of suitcase
group and attach so that it overlaps the photo mats. Take the small airplane
image that was separated from the saying and attach underneath horizontal photo
mat. Take banner pieces and using 1/16-hole punch, punch two holes on the left
and right side of banner at the top. String twine through holes and add a pop
dot to the top of each banner piece. Place in the top right corner overlapping
photo mats. When happy with position, remove backing from foam tape and attach,
one at a time. Take piercing tool and poke hole through layout where you want
the brads to attach. Insert the brad half way through paper and wrap twine
around brad. Push all the way through and open prongs from behind. Repeat for
second brad. Trim excess twine as desired and your page is complete!
Thanks for Makin' with Bacon! Have a crafty day!
|


No comments:
Post a Comment