Monday, March 26, 2018

Travel Far and Away with Rebecca

Hi, everyone!! Last Thursday I did my first "Live" on my My Facebook Page 
I really had fun doing it and think I just might start doing one every Thursday. It's a great way to interact and craft with people from all over the world! Today's blog post is all about PowderPuff Chalk Inks...


 PowderPuff Chalk inks are so versatile and are a staple in my crafting. Of course, they are excellent to add a distressed look to the edges of paper and cardstock. They cover chipboard quickly and easily and stamp beautifully with any type of stamp...polymer, red rubber, etc. They also blend very smooth to create backgrounds for cards and photo mats. I used my chalk inks in a few of the ways I mentioned to create the following layout... 


Wonderful Planes

****************************


I began my layout by gathering my embellishments.

**********************


I stamped the clouds on white cardstock using Deep Sea chalk ink and then cut them out using a coordinating die. The airplane was die cut out of grey cardstock and inked with Cool Grey chalk ink. I used a 1 1/4 circle punch to punch out the circle sayings from the Cardstock Paper Phrases. I used Deep Sea once again to ink the edges.

*************************


Next, I created my photo mats by taking plain white cardstock and using a blending tool. I layered Cool Grey ink until I achieved the level of color I wanted. It was the perfect mat for the cardstock phrase I had chosen. I also used the same color to edge the individual suitcases I fussy cut from the paper.

************************


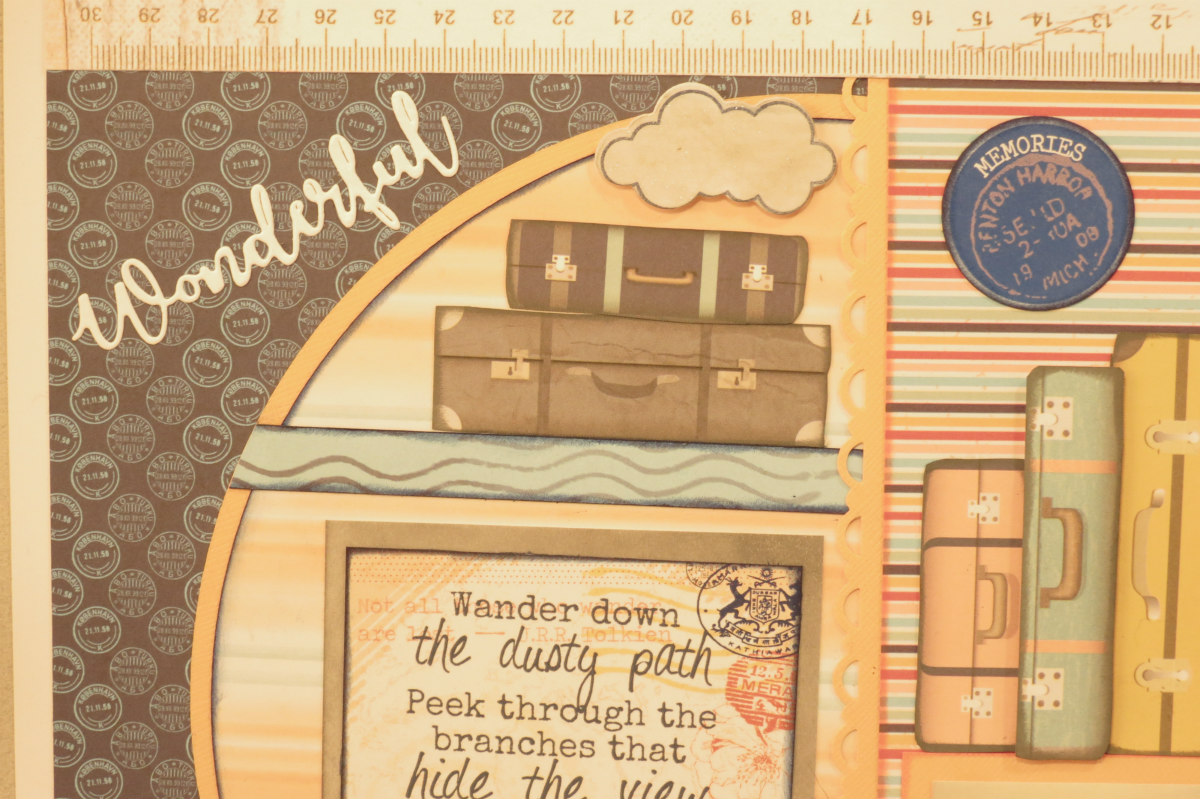
I used Tropical Punch ink to edge the semi-circle and striped paper, too. 

********************

Right side of the layout

Left side of layout


********************

As you can see, PowderPuff chalk are really a must-have item for crafting! With so many colors available, you certainly can find a color for any crafting need. You can also use them for a technique I showed in a earlier post on the blog. You can find it here.


Products Used:


Other Products Used:
Cardstock-Bazzill, Club Scrap, Core'dinations
Border Punch-Stampin Up! 
Airplane die cut and phrases-Sizzix 
Cloud stamp and die-Cele'brations by Richard Garay 


Thursday, March 15, 2018

Spring Break with Rebecca


Good day, everyone!  The season of Spring brings thoughts of  blooming flowers, robins and for some of the lucky ones...Spring Break! I used the Navigator Paper Pack to create the following double page layout.


By the Sea


**********************************

This layout was inspired by all the strips of paper I had leftover from previous layouts I had created. I simply cut down the paper into strips that ranged from 4.5, 2.5, 1.5 and .5 inch strips. 

I inked all the strips with Kokomo, Capri Blue and Sandy Shore.

I used one sheet of the colored world map paper on left side of the page and used the half sheet on the right side of the layout. I completed the right side of the page using the strips in various widths. I repeated layering strips on the left side of the page but went horizontal instead of vertical. 

***********************************


*************************************
I stamped the flowers using Tropical Punch, the sea leaves with Cactus and the tree branches with Sandy Shore. I die cut the images and colored them with the same ink using a blending tool.

*************************************


***************************************
After matting and placing my photos, I began to layer my flowers, shells and sea leaves.  I used a circle punch to punch out the circle phrases from the cardstock paper phrases.

***************************************


******************************************
I used a large die cut to mat the photo in the center of the page. I layers the flowers, sea leaves, and tree branches along the bottom of the photo. I had to strips left to use, so I cut a "v" out of the ends of them and placed them over the photo. I added some pearl flourishes as an added embellishment.

******************************************


I repeated the flower layering on the right side of the page and added copper brads to the phrase I cut out of the cardstock phrases and popped it up with foam tape. 

Although, I won't be "Spring Breaking" somewhere warm, this layout will remind me of the beautiful sea that is so blue. I hope you enjoyed today's blog post! 


Quick Qutoes Products used:
Navigator Paper Pack-coming soon
Navigator Cardstock Phrases-coming soon
PowderPuff Chalk Ink: Tropical PunchCapri BlueCactusSandy ShoreKokomo

Other products used:

Tree branches, flowers, shells and sea leaves-Heartfelt Creations
pearl flourish-Want 2 Scrap
Large Die cut-Spellbinders
cardstock, trimmer, glue, prills


Monday, March 5, 2018

Good day, everyone! The last few days in Indiana have been giving us a glimpse of spring! Although, in Indiana, you can have all four seasons in the same week 😀 Quick Quotes new paper line, Spring Flowers is the perfect paper for any occasion. Take a look at the layout I created with it inspired by the spring weather. My great-niece, Hailey, is a gymnast. Silk ropes is a training method for her. I don't have any daughters and "Hailey Bug" or "Buggy" is like a daughter to me. When her Mom sent me these photos of her, I knew exactly want I wanted to do ...


                                                               Beauty in Motion


  • I used one full 12 x 12 sheet of the argyle print with floral print (base page) and a 4.5 x12 strip of another sheet. (Set this piece aside for later)
  • I also used the argyle plain print for the second page ( second base page)
  • Next, die cut a 10.5, 4.5 and 5.5 inch circle out of coordinating blue cardstock. 
  • Using a sheet from the Navigator paper pack, die cut the title. Use a dark blue card stock to die cut a shadow for title if desired. 
  • Using the leftover scrap after cutting the title, cut one long strip and die cut a few flourishes. Also, punch some flowers from scrap white paper and coral paper.
  • Take the white wood board paper with floral prints and cut another strip
  • I had ribbon with flowers on in it in my stash...you could easily make it if you didn't have the exact same thing.


Now, we can begin to assemble the page very simply...


1. Take the two strips and glue to largest circle. 
2. Trim excess and ink edges with chalk ink.
3. Glue to center of base page.
4. Attach photo. 
5.Title and ribbon
6. Flourishes and flowers.


Page 2 Assembly...

1. Ribbon is glued to the bottom of the layout.
2. Title is wedged between flowers.
3. Ink the 4.5 x 12 inch strip with chalk ink and glue to base page.  See note below***

***The 4.5 x 12 inch piece I said to set aside. I took the chalk ink and not only edged it but covered the entire piece to change its color to add the contrast I was looking for.

4. Add card stock circles in a diagonal fashion. 
5. Place photos
6. Add flourishes and flowers.
7. Add center to flowers, if desired.

I hope you enjoy today's post! Have a great day!


Quick Quotes Products Used:
Spring Flowers...coming soon


other products used:
flouish- Cheery Lynn
flower punch-Ek Success
ribbon-May Arts
title-Cricut/Opposite Attract
flower centers-Nuvo drops